
Sometimes, updating your MAG box to the latest firmware version is the most effective way to resolve issues. The following steps will walk you through the firmware update process.
How to Update the Firmware on a MAG Box
First, disconnect your MAG box from the internet.
Then, perform a reset on the device.
Wait until the screen displays a “Page Loading Error.”
Once you see the error, reconnect the internet cable to the box.
Select Embedded Portal—this should trigger the automatic firmware update.
If the update doesn’t start automatically, press the SET button on your remote, go to Software Update, press OK, and then press the F1 button to begin the update manually.
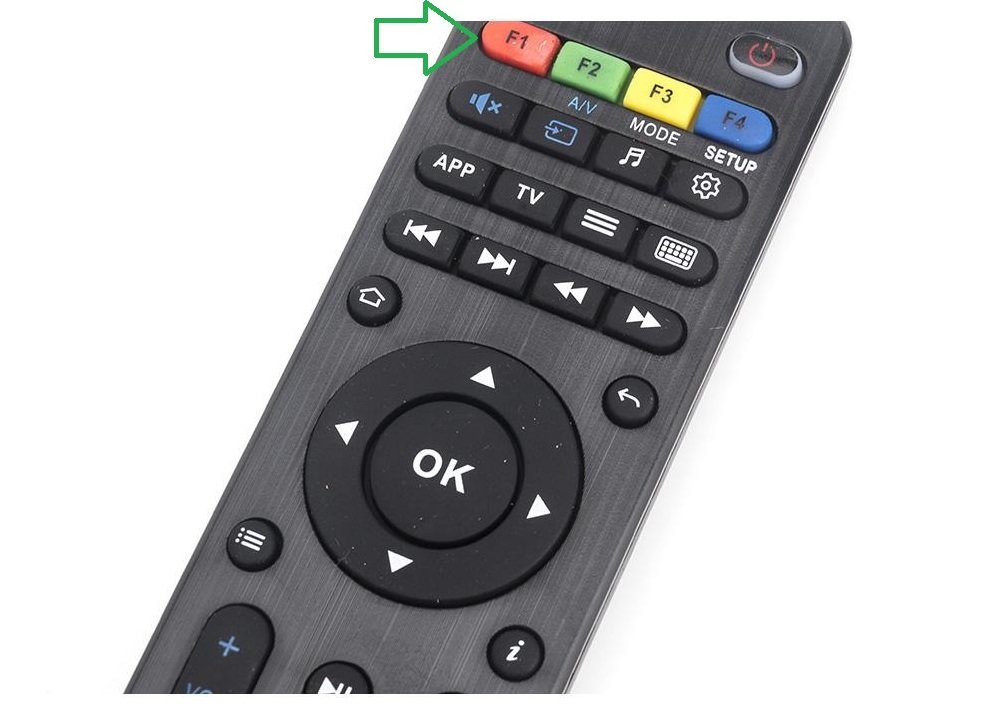
Some MAG devices may lose their portal settings after being updated to the latest system software, which prevents users from adding or configuring portal addresses.
In this guide, we’ll show you how to downgrade the system software to a stable version using a USB drive.
How to Update/Downgrade MAG Firmware via USB
To update your MAG device through the system settings using a USB stick, follow these steps:
Step 1: Ensure your USB drive meets the necessary compatibility requirements.
Step 2: Download the appropriate software image file named “imageupdate.”
Note: The latest factory software images are available on the manufacturer’s server:
(Replace http://update.infomir.com/mag/<model>/imageupdate
(Replace <model> with your MAG device number. For example, for MAG322:
http://update.infomir.com/mag/322/imageupdate)
Step 3: On the root of the USB drive, create a folder named mag<model> and place the imageupdate file inside that folder.
For example, for MAG322, the folder should be named mag322.
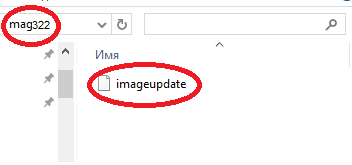
Step 4: Connect prepared USB-drive to STB. You can use any USB connector of STB: both rear or front.
Step 5: Open Settings⇒ System settings ⇒ Software update.
Step 6: In Software update window set Update method = USB. You can see two new strings:
Disk – name of USB-drive;
Path – Path to update file on the USB-drive.
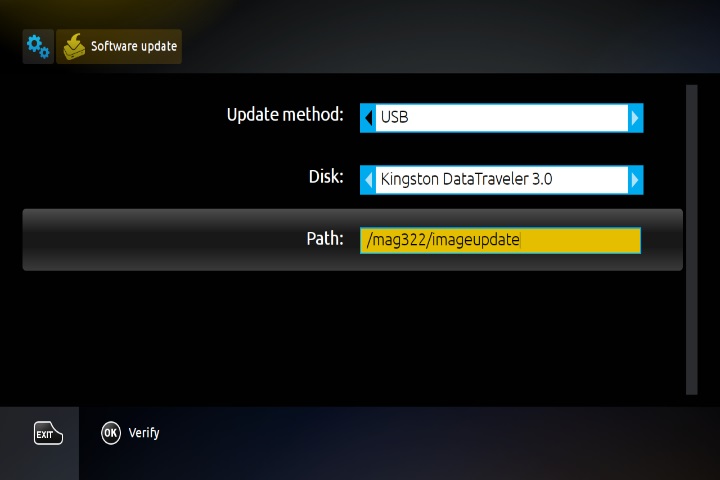
Step 7: Select Verify (OK) to make sure that STB can detect “imageupdate” file.
Step 8: If the file is detected and readable successfully you’ll see Software Update window.
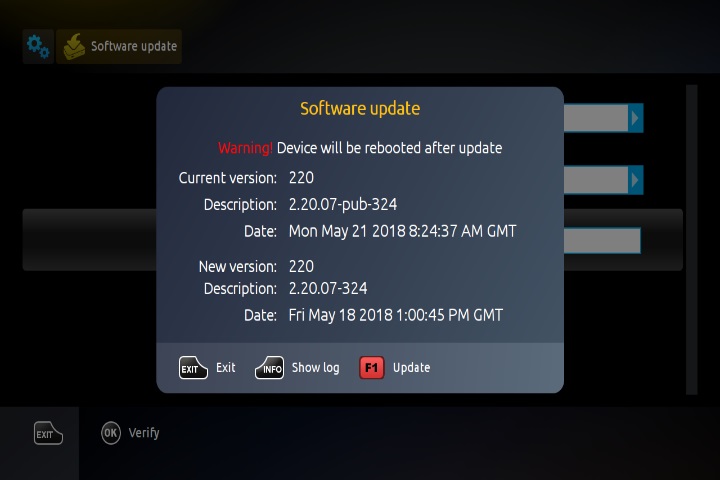
Step 9: In the Software Update window displays descriptions of the firmware versions: the Current version (operating in STB) and New version (available on a USB drive).
Step 10: Select subsequent operation after comparing Current and New versions:
To reject update push Exit.
To start update push Update (F1).
Step 11: The status of the software update is displayed by the progress bar and comments. To view the log of update user may push Show log (Info on RC).
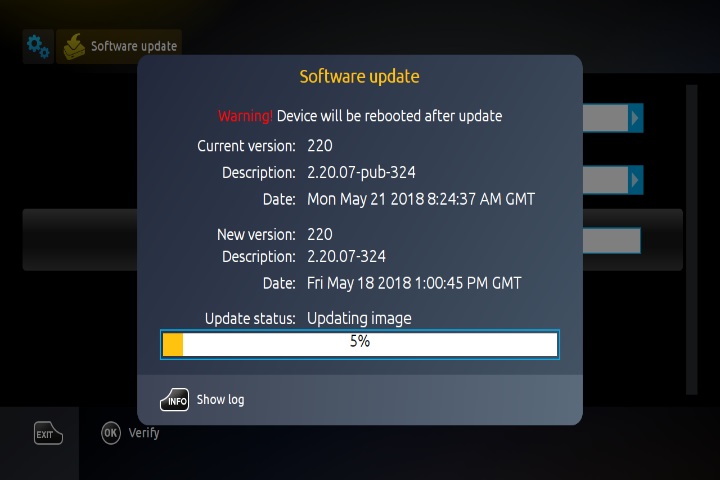
Step 12: Wait until the update process is complete. After completing the update, the STB automatically reboots.
Note. Do not turn off STB and plug off USB drive until the end of the update.